-
Who This Is For
-
The 7-Point Sterile Processing Checklist
-
Step 1: Identify the tray and confirm the IFU
-
Step 2: Clean in the washer-disinfector or manually per IFU
-
Step 3: Inspect under good light
-
Step 4: Package the tray properly with an internal chemical indicator
-
Step 5: Load the autoclave machine with clearance and drainage
-
Step 6: Select the cycle from the IFU, not from the previous tech’s memory
-
Step 7: Verify after the door opens
-
Step 1: Identify the tray and confirm the IFU
- Two Common Mistakes That Worry Me
-
Why I Keep Using This Checklist
Who This Is For
If you’ve ever stood in front of a heavy instrument tray at the end of a shift and thought, “It’s a standard set, just run it,” this checklist is for you. I’m not an educator or a compliance specialist. I’ve spent nine years in sterile processing, first at a 150-bed hospital and now at a regional medical center. In that time I’ve personally made eleven stupid mistakes that flattened out to roughly $9,400 in wasted budget.
The mistake that changed how I load an autoclave machine happened in March 2022. I loaded a loaner orthopedic set with an outdated IFU in my head. The manufacturer had just revised the reprocessing cycle for one insulated instrument in that tray. I skipped the pre-check because the set “looked the same” as last month. The insulation came out blistered, the tray was pulled one day before a surgeon needed it, and I was the person who signed the load sheet. Looking back, I should have spent five minutes on the IFU. At the time, the previous tech had told me loaner reps always send the correct cycles, which sounded easier.
That’s when I built this seven-point checklist. Since June 2022, our department has caught 47 issues before they reached a sterilizer, including wrong containers, missing internal indicators, and instruments with no documented reprocessing cycle. The estimated rework and replacement costs we’ve avoided is roughly $8,000 so far. I say “roughly,” because my spreadsheet has not been audited, but that’s the number I track.
The 7-Point Sterile Processing Checklist
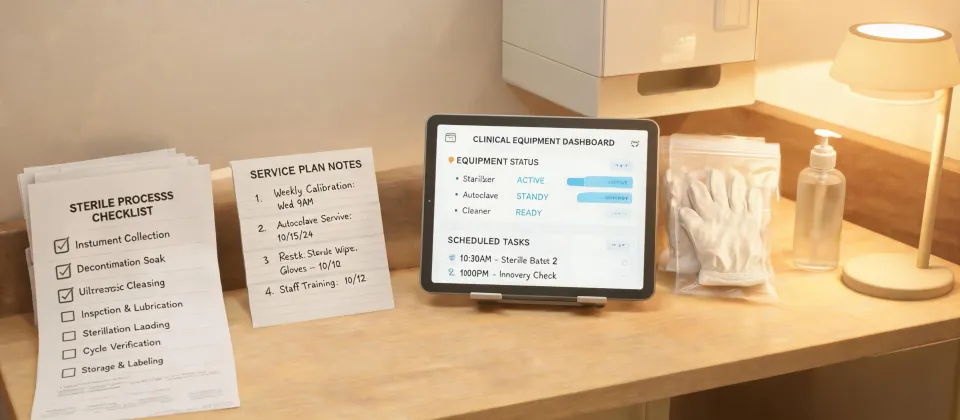
For routine steam sterilization of surgical instruments, I mentally run through seven checkpoints before the autoclave machine gets closed. Here is the order that has been working for me.
Step 1: Identify the tray and confirm the IFU
This is the step everyone thinks they can skip when they’ve “done it a hundred times.” I still ask to see the IFU for any loaner tray, any repaired item, and any new instrument. If it’s an item we purchased in our own inventory, the STERIS products catalogue can help me identify the exact product number, container, and sterilization accessory. The catalogue identification step doesn’t replace the manufacturer’s instructions for use; it just makes sure I’m looking at the correct device. I’ve found two similar basin sets in our stock, and the lids were not interchangeable under the container IFUs.
My rule: no documented IFU, no load. Loaner sets get quarantined until the sales rep sends the current instructions, even if the procedure is scheduled for tomorrow.
Step 2: Clean in the washer-disinfector or manually per IFU
Cleaning isn’t sterilization, and the washer-disinfector isn’t a sterilizer. It cleans and thermally disinfects. I used to think “I’ll just run it through a washer first” was enough. It isn’t. If an instrument still has blood, bone, or debris inside a lumen, the later steam cycle can’t do its job well. Residual soil can hide microorganisms and interfere with the sterilant.
For mechanical cleaning, I read the STERIS washer/disinfector manual that matches the model I’m using—not the manual from the other unit down the hall. The manual shows the valid racks, water quality requirements, and cycle parameters. It also lists what should not go into that machine. One of the first errors I documented was placing a multi-lumen tube on the wrong irrigation rack. The cycle completed, but two outlets were still blocked with soil. Cost me $560 in extra reprocessing labor and an OR delay.
If the IFU requires manual cleaning, do not let efficiency convince you otherwise. Manual cleaning includes brushing, flushing, and submerging the device correctly before it moves to the packaging room.
Step 3: Inspect under good light
After cleaning, before packaging, every instrument gets inspected. I’m not talking about a glance while dripping wet. We check box locks, hinges, and crevices. We look for cracks, pitting, rust, and leftover adhesive from tape. We verify that blades are not chipped or bent and that insulated shafts have no exposed areas.
If an instrument has multiple parts, disassemble it and inspect each part separately. The check that most people skip: confirm the tray matches its inventory list. You can sterilize a perfect set with one missing clamp, or you can add an unlisted extra instrument at the last second. If you add something that was not part of the listed tray contents, the whole set’s validated loading and processing record no longer applies. It sounds hyper careful, but I’ve seen a loose hemostat bounce around a rigid container and damage a very expensive endoscope shaft.
Step 4: Package the tray properly with an internal chemical indicator
Packaging keeps a sterilized item from being recontaminated after the cycle. The packaging and indicator also need to let the sterilant reach the device. A chemical integrator goes inside every package, not just on the tape outside. One of the repeated mistakes I’ve caught is a brightly colored external indicator on a wrapped set while the internal indicator in the tray stayed unchanged. According to AAMI ST79, internal chemical indicators should be placed in the area most difficult for steam to penetrate, not in the easiest corner to see.
If the tray has hinged or sliding instruments, keep them in the open position. Include the count sheet. Use a packaging system that is compatible with the selected cycle, and follow the peel pouch or wrap manufacturer’s sealing instructions.
Step 5: Load the autoclave machine with clearance and drainage
The autoclave machine I use is a sterilizer, but it’s not a storage shelf. Load it according to the sterilizer manufacturer’s operator manual and the container or wrap manufacturer’s instructions, not by whatever fits. Leave space between packages. Place basins and receptacles so condensate can’t pool. Rigid containers should be placed so the vents are exposed and not blocked by another container unless the container manufacturer says stacking is okay.
This is the point where experience can hurt you. The load before the next morning’s first case isn’t always the same setup. A dense washer-disinfector load may mean the sterilization load needs fewer packages, not more.
Step 6: Select the cycle from the IFU, not from the previous tech’s memory
Once the load is ready, the actual cycle parameters need to match the IFU and the sterilizer’s validated operating instructions. Common steam cycles fall into gravity and prevacuum groups, and the exposure temperatures and times are not interchangeable.
If the IFU says “high vacuum, 270°F, 4 minutes,” don’t choose “gravity, 270°F, 10 minutes” because it feels more thorough. More time and heat isn’t a safety upgrade when the device or packaging isn’t validated for it. And if you don’t have a cycle in the autoclave machine that matches the IFU, stop. The item may need low-temperature sterilization or high-level disinfection instead.
Step 7: Verify after the door opens
The cycle is finished only when the paperwork, physical monitors, package condition, and biological monitoring are all accounted for. If the load includes implants, I don’t release it until the biological indicator result is known to be negative. According to AAMI ST79, biological indicators should be used regularly, and many implant protocols run a biological indicator with the implant load.
After the cycle, I check the sterilizer record for the correct temperature, exposure time, dry time, and any alarms. Then I let the packages cool and dry on a rack before storing. If a package comes out feeling damp, or if the internal indicator hasn’t changed, the package is not acceptable. A “wet pack” can wick microorganisms through the wrapper. And the external tape turning brown is not the same as proof that steam reached inside.
Before I release a set, I document the load number, contents, sterilizer number, cycle parameters, operator, and the internal indicator reading. It’s not bureaucratic busywork. When a surgeon calls two days later asking if a specific clamp was in the load, that record is the only way to know.
Two Common Mistakes That Worry Me
Trying to sterilize something that was never validated for steam
Flexible endoscopes, powered instruments, batteries, and many electronic components have their own reprocessing instructions. A good rule is to stop assuming the autoclave machine is the default for everything that can tolerate heat. The temperature sensor from an infant warmer is a good example. It looks like a plain metal probe, but it has electrical components inside. I’ve seen these on a “sterile accessory” cart, and there is no way to know the approved process without checking the manufacturer’s IFU. It may require low-temperature sterilization, high-level disinfection, or a single-use probe cover.
If the manufacturer says “single use only,” don’t try to reuse it. If a loaner instruction guide says “do not steam sterilize,” respect the guide. The machine brand doesn’t change that rule.
Using the outside indicator as an okay sign
External indicators are useful for identifying whether a package has been through a process. They don’t verify that steam reached the inside. I have pulled open trays where the outside tape changed color while the internal integrator in the center hadn’t. The cause was usually an overloaded chamber or an inappropriately wrapped set. That’s exactly why the internal indicator placement in Step 4 matters.
Why I Keep Using This Checklist
I have mixed feelings about being the person who “has a story for every mistake.” On one hand, I’d rather not be the cautionary tale. On the other, those stories make new techs pay attention faster than any slideshow I’ve put together.
The checklist is the cheapest insurance in the department. I can verify a set in five minutes. The alternative is an expensive repair, a delayed case, a recalled load, or a patient who is harmed by my shortcut. If you’re looking for a place to start, start with Step 1: read the IFU, and build your own checklist around it.
This article is for operational guidance only and is not a substitute for your facility’s policies or the manufacturer’s instructions. Always verify the current IFU for the specific device. Follow the current ANSI/AAMI ST79 guidance and the CDC Guideline for Disinfection and Sterilization in Healthcare Facilities.